Autocentering
Understand and run auto-centering
1 What is auto-centering ?
Auto-centering is an automated procedure to center the sample on the beam using computer vision assistance powered by a program called C3D.
Auto-centering always starts with loop pre-centering followed by auto-zooming. There are different kind of procedures:
- Loop auto-centering when loading a sample with the sample changer
- Crystal auto-centering using crystal recognition
- Centering Playback: restoration of a previous centering using snapshots stored in the ISPyB database (a pattern matching algorithm)
2 Run auto-centering
2.1 Enable/disable loop auto-centering
From the little box called 'Automatic Centring' below the Sample changer brick accessible in the in the 'Collect' tab of MxCuBE.
"Do auto loop centring" toggles the association between Sample Changer loading and starting of auto loop centering.
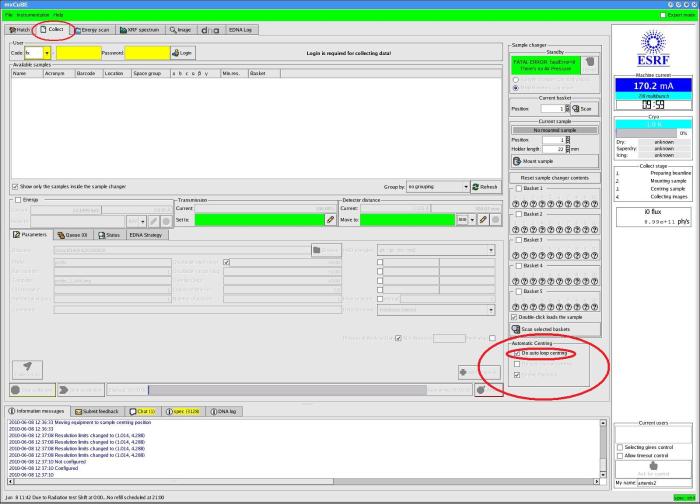
Test:
If this radio button item is enabled, you can test loop centering by typing the following command in the SPEC session:
minidiff_prepare_centring
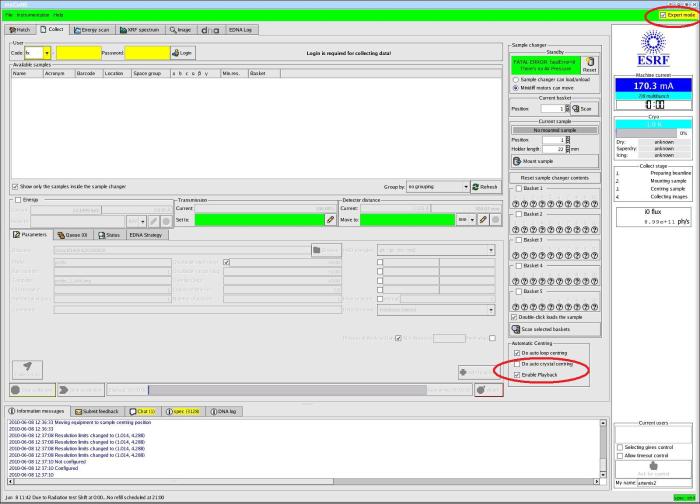
2.2 Enable/disable crystal auto-centering
In order to access the crystal auto-centring and the Playback centring options, you will need to be logged in as 'Expert mode' (top right button of the top green banner in MXcube).
Select “Do auto crystal centring” in the little box called 'Automatic Centring' below the Sample changer brick and accessible in the in the'Collect' tab of MxCuBE.
- When doing a pipeline experiment using EDNA, the computer assisted centering will start automatically, each time after loading a sample with the sample changer.
- If the sample was already centered, and if centering snapshots were saved in IspyB (upon click on "Accept" button), the centering server will reproduce the previous manual centering: centering Playback is activated. To disable this, deselect the radio button called 'Enable Playback' from the 'Automatic centring' box
2.3 Follow the results
Information about the ongoing process is displayed in mxCubE log and at the bottom of the sample display.
Once the auto-centering is done, the behavior depends on the “User confirm” option, as explained in next paragraph.
2.4 User interaction
Check the “User confirm” option to give you the opportunity to control and manually improve each centering before saving snapshots, even during a pipeline experiment using EDNA. This option is accessible in the 'Hutch' Tab by the 'Accept' button above the crystal view.
If the “User confirm” option is not set, data collection is started automatically at the end of the auto-centering.
If the auto-centering fails, you can read the next paragraphs.
3 Quick Troubleshoot auto-centering:
3.1 If the centering doesn’t start
The server state can be checked using the Interface of Dserver program or using a command line.
- Interface
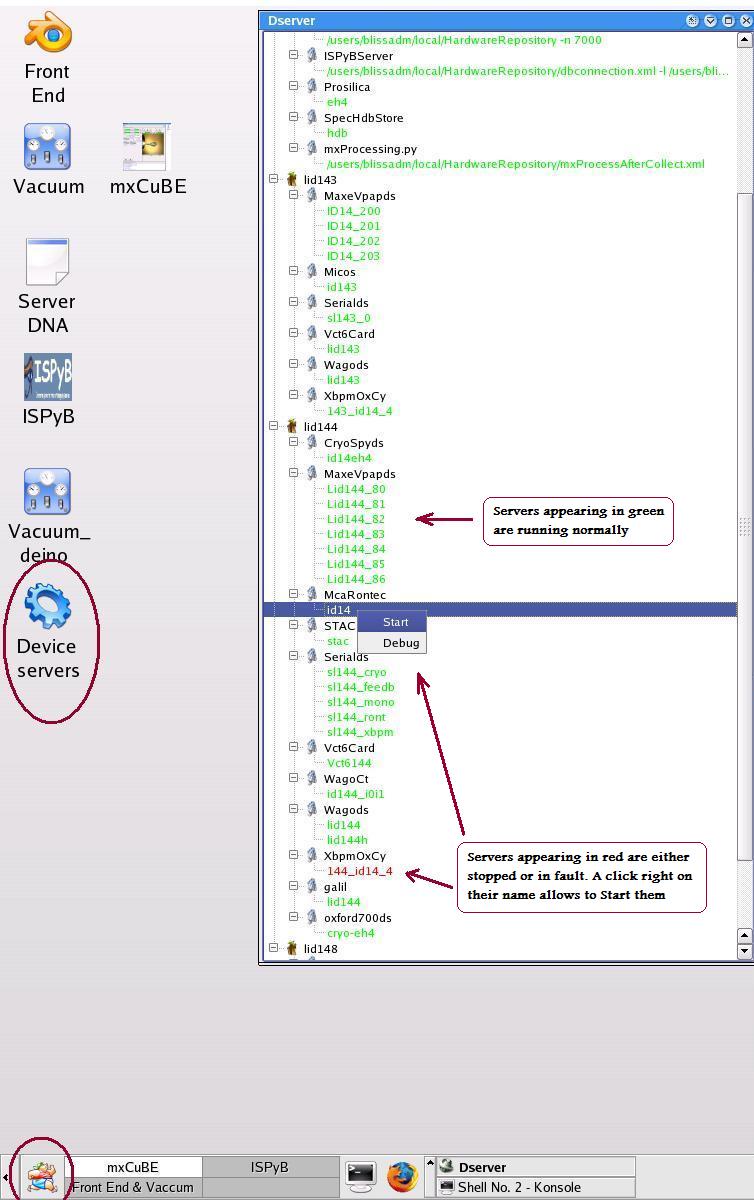
Click right on the of Mxautocentring server, and use Stop/Start buttons to restart it.
- Command line:
- check: bliss_dserver status
- restart: bliss_dserver start CentringServer
CentringServer is a script launching the python server "Mxautocentring.py".
If CentringServer is “None” in the bliss_dserver status, the program has to (re)started. In case of restart failure, first check the server's owner; the server might also be freezed: in this case you must kill it manually.
3.2 If loop pre-centering is bad
- Most of the time it is because the background around the sample changed. The reason could be lighting changes, or presence of objects (e.g. cryo nozzle) creating a shadow.
Before you take background images please make sure your cryostream is well aligned and that there is no sample on the goniometer head.
Take up-to-date background snapshots using a spec macro:
minidiff_take_backgrounds
MxCuBE goes through all zoom levels to take snapshots.
Before taking the snapshots, the goniometer should move to the right state: backlight on, front light off, beamstop off. The state is equivalent to the position prepared by the macro "minidiff_prepare_centering".
- Sometimes errors come from loop shape detection (e.g. strongly bended or iced). Try with another loop.
4 Some requirements and limitations
- About light: the lighting default settings should avoid saturation at each zoom level. A good criterion is to have a homogeneous background above zoom 2. Front lighting must be switched off because it generates strong light reflections not supported by the program. If the lighting settings are not correct, it is very important to get up to date background snapshots.
- About loops: crystal detection is not supported in MicroMounts.
- About playback: centering Playback works only if the previous centering where made on the same machine under the same session. At the end of a manual centering (intended to be used for the Playback), you must select a zoom level where the loop is entirely visible (e. g. half the display in size) before pressing the "Accept button"
- About crystals: fishing is difficult but one should avoid these conditions: multiple crystals in the loop, crystal out of the loop, icing and bad flash freezing of mother liquid (should be transparent as much as possible) and tiny crystals in big drops (leading to dramatic lens effects).
partners


European Synchrotron Radiation Facility - 71, avenue des Martyrs, CS 40220, 38043 Grenoble Cedex 9, France.